1. Getting Started
SheetSync is a python library to create, update and delete rows of data in a google spreadsheet.
1.1. Installation
Install from PyPi using pip:
pip install sheetsync
Or you can clone the git repo and install from the code:
git clone git@github.com:mbrenig/sheetsync.git LocalSheetSync
pip install LocalSheetSync
Note, you may need to run the commands above with sudo.
1.2. Setting up OAuth 2.0 access
In May 2015 Google retired old API access methods, and recommended users migrate to OAuth 2.0. OAuth2.0 is better for security and privacy but it means getting started with sheetsync involves a bit of extra configuration.
The steps below (written in 2015) guide you through API configuration and a simple script to manipulate a Google sheet. They will take around 20 minutes to complete.
Warning
This tutorial is designed to get you using sheetsync quickly. It is insecure because your client secret is stored in plain text. If someone obtains your client secret, they could use it to consume your quota, incur charges or request access to user data.
Before using sheetsync in production you should learn about Client IDs and replace the ia_credentials_helper() function with your own function that manages authentication and creates an OAuth2Credentials object.
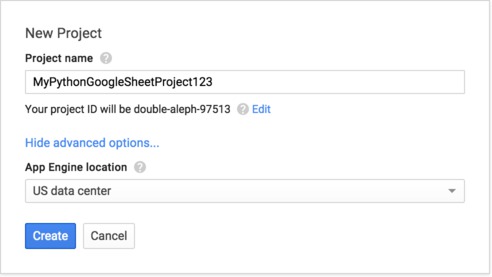
1.2.1. New Project
Start by setting up a new project via Google’s developer console, console.developers.google.com:

Pick a project name:
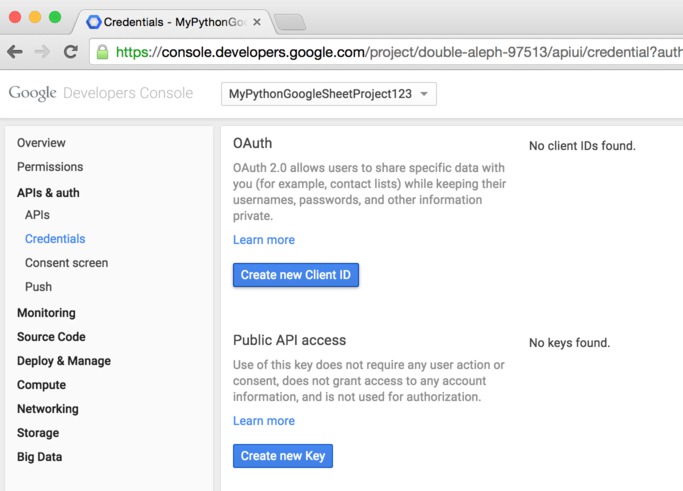
1.2.2. Create a new Client ID
From your new project’s configuration panel, in the console, select “Credentials” from the lefthand menu and then “Create new Client ID” for OAuth:
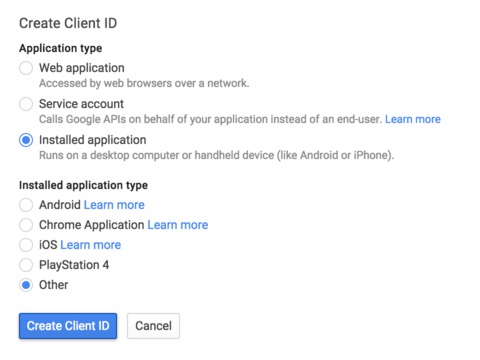
For this tutorial, choose the type Installed application:
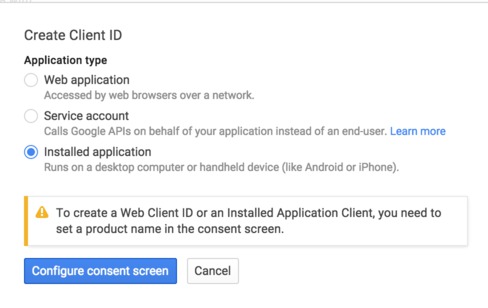
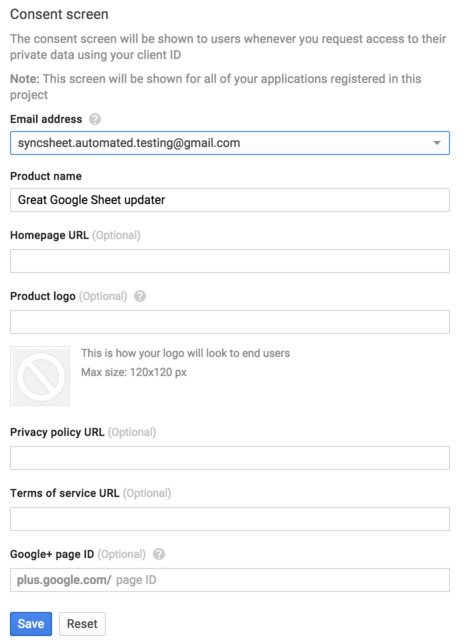
The consent screen is what users will see when the sheetsync script asks for access to their Google drive.
Finally select “Other” for Installed application type:
The steps above should have got to you a page that displays your new Client ID and Client Secret. For example:


1.3. Injecting data to a Google sheet
sheetsync works with data in a dictionary of dictionaries. Each row is represented by a dictionary, and these are themselves stored in a dictionary indexed by a row-specific key. For example this dictionary represents two rows of data each with columns “Color” and “Performer”:
1 2 3 | data = { "Kermit": {"Color" : "Green", "Performer" : "Jim Henson"},
"Miss Piggy" : {"Color" : "Pink", "Performer" : "Frank Oz"}
}
|
To insert this data (add or update rows) into a target worksheet in a google spreadsheet doc use this code:
1 2 3 4 5 6 7 8 9 10 11 12 13 14 15 16 17 18 19 | import logging
from sheetsync import Sheet, ia_credentials_helper
# Turn on logging so you can see what sheetsync is doing.
logging.getLogger('sheetsync').setLevel(logging.DEBUG)
logging.basicConfig()
# Create OAuth2 credentials, or reload them from a local cache file.
CLIENT_ID = '171566521677-3ppd15g5u4lv93van0eri4tbk4fmaq2c.apps.googleusercontent.com'
CLIENT_SECRET = 'QJN*****************hk-i'
creds = ia_credentials_helper(CLIENT_ID, CLIENT_SECRET,
credentials_cache_file='cred_cache.json')
data = { "Kermit": {"Color" : "Green", "Performer" : "Jim Henson"},
         "Miss Piggy" : {"Color" : "Pink", "Performer" : "Frank Oz"}
        }
# Find or create a spreadsheet, then inject data.
target = Sheet(credentials=creds, document_name="sheetsync Getting Started")
target.inject(data)
print "Spreadsheet created here: %s" % target.document_href
|
The first part of this script (lines 1-11) imports the Sheet object and
ia_credentials_helper function. This function is included to help you quickly
generate an OAuth2Credentials object using your Client ID and Secret.
When the ia_credentials_helper function runs it will print a URL to allow
you to grant the script access, like this:

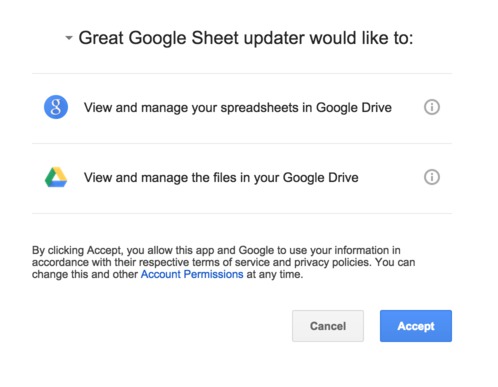
From this URL (you may have to log in to a Google Drive account) you will be prompted to give the API Client you set up in section 1.2, access to your documents:
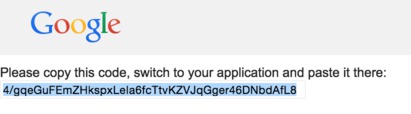
After accepting you’re presented with a verification code that you must paste back into the script:
At this point ia_credentials_helper also caches the credentials - so that
you don’t need to repeat this step on future runs of the script.
The later code defines the table data (lines 13,14) then line 17 creates a new spreadsheet document in your google drive. Finaly line 18 inserts the data resulting in:
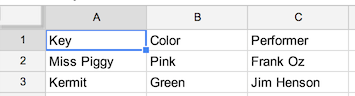
It also prints the URL of the google sheet so you can view the result for yourself.
Since you’ll probably want to update this spreadsheet, take note of the spreadsheet’s document key from the URL:

and then you can inject new data to the existing document by initializing the sheet as follows:
1 2 3 | target = Sheet(credentials=creds,
document_key="1bnieREGAyXZ2TnhXgYrlacCIY09Q2IfGXNZbjsvj82M",
worksheet_name="Sheet1")
|
Note
The ‘inject’ method only adds or updates rows. If you want to delete rows from the spreadsheet to keep it in sync with the input data then use the ‘sync’ method described in the next section.